Availability is created and managed in your Schedule screen
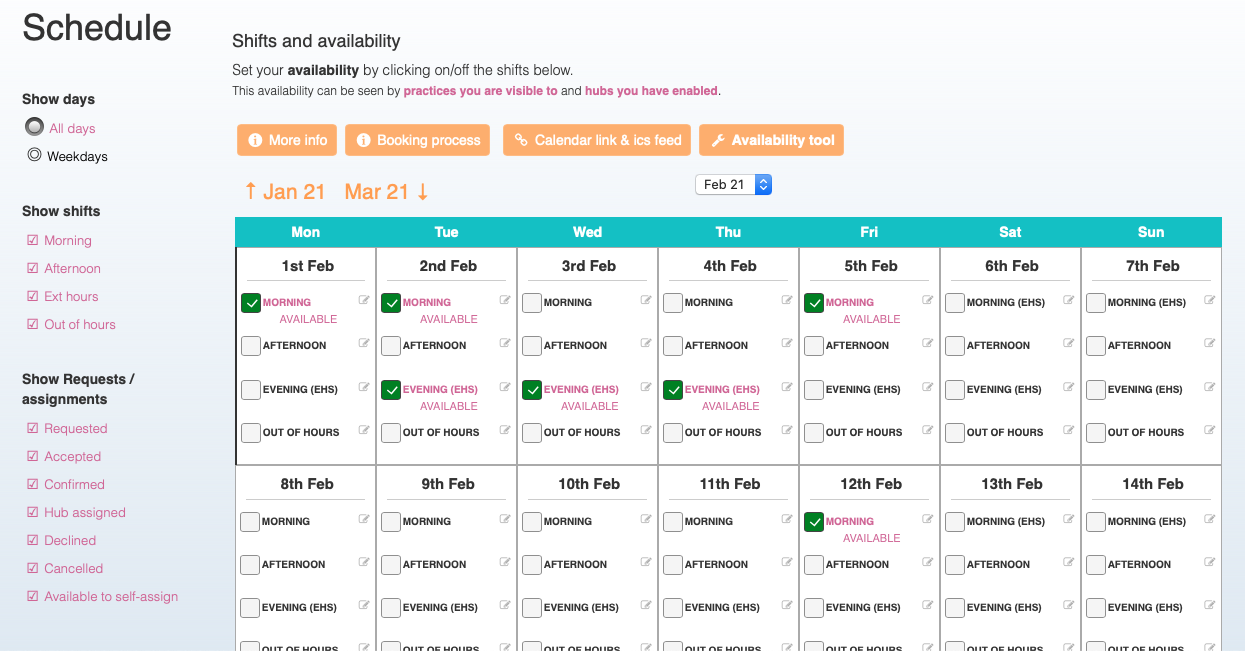
That’s this screen (when you’re logged in)

Adding & removing your availability
This screen shows a calendar view with month pagination at the top.
The days are divided into 4 notional segments. They do not represent actual start and end times for shifts, as that would be too restrictive to employers. Instead they represent your general availability. Actual start and end times for shifts are set by employers when they create requests or build a rota. (note: a shift can span two segments).
In other words, specific shift times become known to you at the point of a request or assignment. At this point there are still options to decline requests or to cancel commitments.
You add or remove availability for any segment of a day by clicking on that part in the Schedule (it’s an on/off toggle)
About your availability
Any availability you create is connected, via the system, to any employers you are joined with, via your account.
You can manage your relationships with the various types of employers from two key screens:


Using your account as a Hub only user
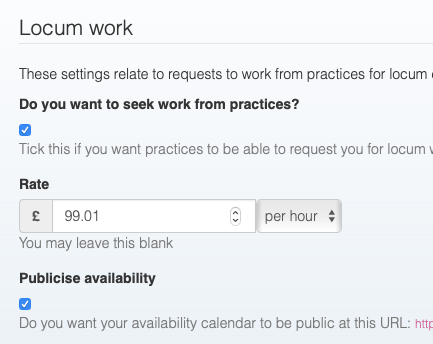
If you wish to use your account as a Hub only account, you can switch off locum status altogether from within your Profile:
The bulk availability tool
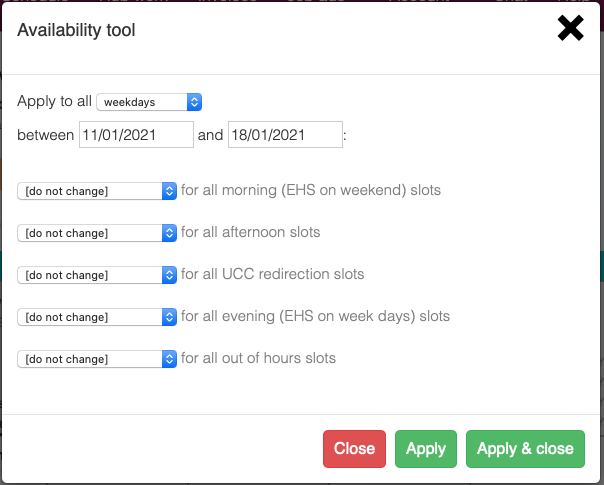
There is a bulk availability management tool available in the Schedule screen. The best way to think about the capability of this tool is as a bot, that will perform multiple tasks in your calendar for you. You simply configure the actions you want it to perform and click ‘Apply’
Schedule filters
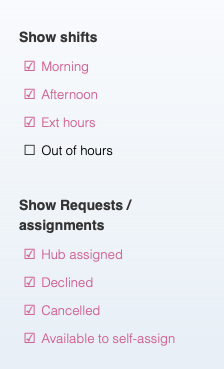
These are a useful way to filter the view of your Schedule screen and have no impact on actions or visibility, etc.
For example, if you wish to self-assign to Hub shifts, ensure that the ‘Available to self-assign’ filter is switched ‘on’ or you will not see self-assignment shifts in the Schedule.

