|
|||||||||||||||||||||||||||||||||||||||||||||||||||||||||||||||||
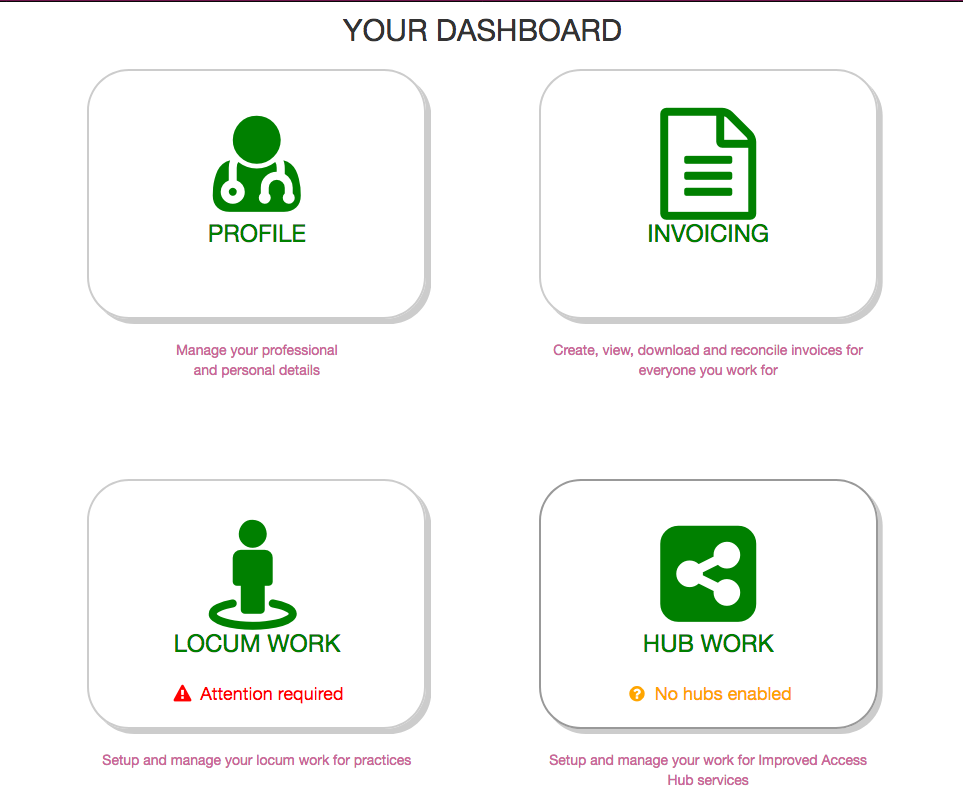
Category: Hubs and hub support


Creating / sharing availability


Joining a Hub with and without an existing GPnetworks account
This diagram explains the process for those with an existing GPnet account for those without an existing account.
registration-process-and-hub-joining
Attachments
Self-assign to a Hub shift
If a Hub wishes you to self-assign to shifts in their rota they will turn this feature on for their Hub.
This means you will see shifts that you are eligible to self-assign to within your Schedule. These you can click on and easily self-assign.
Doing this creates an Assignment in your Schedule and solves that shift for the Hub – no-one else can self assign to the shift once it is claimed in this way.
Here is a short video showing how to ensure you can see self-assignment shifts in your Schedule.
Attachments
Your Schedule, requests for work, assignments and more
Since 2017, GPnetworks has incorporated working with Hub services, combining traditional in-hours work for practices with other forms of shift work such as Extended Hours (EHS).
This has meant that your Schedule has become a little more complex, since it has had to evolve to handle the extra types of shifts, the logic that accompanies them and manage the relationships between all shift types.
From your perspective, there is a single Schedule for all your work. Interpreting your Schedule is aided by the view filters down the left hand side, that allows you to turn on and off different aspects of the Schedule.
Different shift types are shown in different colours to help you interpret your work schedule.
Blue Requests are those you receive from practices.
These are Requests for in-hours shifts at a specific Practice
If you Accept a Blue request this will turn Yellow. This does not mean you have been booked but informs the Practice concerned that you have accepted the Request, The Practice can then confirm the request, which creates a form booking.
A Confirmed request will show as green in your Schedule and you will get an email reminder the day before the shift.
— — —
Hub Service Assignments
When you use your Hub Work screen to connect to and show availability to a Hub service, you may then receive Assignments from the Hub – the are shown as light green in your Schedule.
Hubs also provide an additional method of picking up shifts called self-assignment. Three weeks before a shift you will see the shift in your Schedule in dark grey and can click to self-assign to the shift.
(please note: to see self-assignment shifts in your schedule, the self-assignment filter on the left side of your schedule screen must be turned on)
— — —
Rest assured all the logic that manages Requests and Assignments is handled automatically for you. You cannot be double booked or miss out on an opportunity, so long as you manage your Availability and Visibility to both practices and Hubs properly from within your Account.
— — —
Notifications and reminders
All requests, cancellations and changes within your Schedule are followed up with an email notification. Many of these provide an action within the body of the email so you won’t even need to login to respond,
When you are booked to work, whether for a Practice direct or for a Hub, you will also receive a reminder before the shift.
— — —
Invoicing
After you have worked a Confirmed shift you can use your built in Invoicing feature to generate invoices for practices.
When you work for a Hub service and are paid by the Hub provider, your invoices are automatically generated for you and placed into your Invoices section.
— — —
Cancelled request are shown in red and can be removed from your Schedule.
If you decline a request you have an option to keep the availability in your Schedule for others or to remove it.
— — —
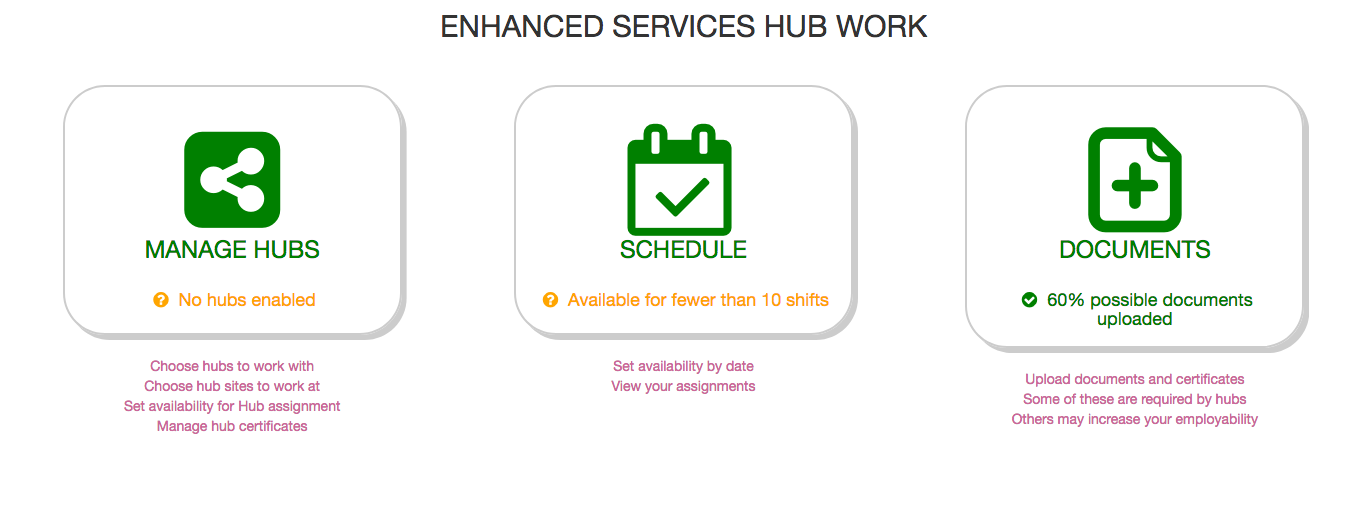
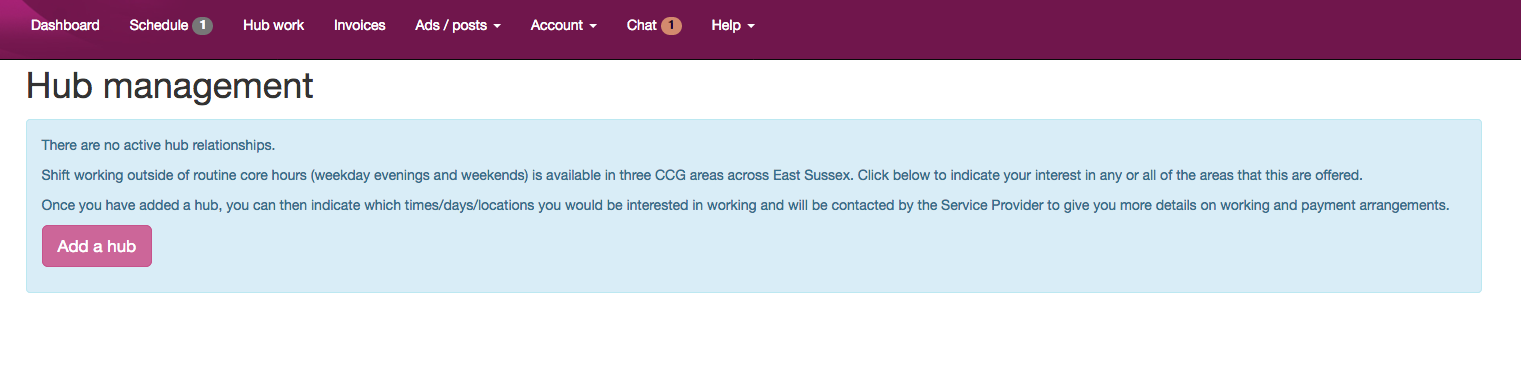
Connect to Hub services
To connect with Hub services and pick up shift assignments you simply need to add a Hub connection to your account.
These screen shots show how to add hub connections to your account from your Dashboard.